It’s a 10 Miracle Leave in Conditioner

Awesome, easy to use product. I have tried a ton of products and they were either not enough moisture or coated the hair instead of penetrating it. I tried expensive conditioners, heating oils,  waxes, butters, ethnic hair products and even grease. All I need was this point and spray product and now I have silky hair.

This stuff ROCKS!

My daughter’s hair doesn’t make oil (she is mixed, soft but ethnic hair). When she was a baby we tried countless products and nothing kept her poor little scalp from flaking until we found this. Now it is a staple in her hair routine. I can tell from the feel of her hair if she misses putting it on after her bath. It is much silkier if she uses this. And easier to brush, bonus points!!

I decided to get a perm in hopes of easy beachy waves. Instead I got kinky dry as straw locks. This leave in conditioner helped bring it back to softness, although I still have to fight the kinky.

So in short, I highly recommend this and always have it in my cabinet.

Instyler – Does it really work?

image

You know the infomercial for “the amazing rotating iron”.

Well, I got hired on to sell it for the state fair. So, I spent 3 weeks using it on every type of hair imaginable. I couldn’t have planned a better test for a review.

The question everyone asks is, “Does it really work?” For certain hair types it really is amazing. For others it is not worth even the state fair price. But if you do buy it keep all the parts and your receipt. Because if anything breaks within 13 months and you have the receipt (you must have all the accessories as well) they will send you a new one.

Pros:

  • For ethnic or grey hair it works amazing. They say it lays down the cuticles instead of crushing the hair. Whatever, it is doing it definitely gets a smoother softer finish than the straightening iron. I have taken hair that was already straightened with the Chi and made it look much better with a few swipes of the Instyler.
  • Price, well the state fair special of $65 or 2 for $100, is cheaper than most quality flat irons. But it is reconditioned, aka B stock.
    For a soft wave it is ok. But make sure to use product to make it hold.
  • Two months before my gig I gave into the urge to get a permanent. Instead of beachy waves I got permanent frizz.  The Instyler smoothed my hair out fast and looked as good as pre perm. Which was wonderful because I had a lot of damage and you couldn’t tell. It is definitely a better finish than the flat iron.
  • When you get the hang of it the Instyler is much faster than straightening with a straightening iron.
  • The comb that comes with it is my new favorite. It is good for everything from combing out the perfect section of hair for Instyling to spanking a disobedient child.

  • You really can get your hair done with a lot less heat. The hottest setting is 385 degrees. Even with ethnic natural hair I could get girls hair straighter and softer than a perm. That is over 100 degrees less than a Chi. That was the most amazing part to me.
  • Cons:

  • Barrel curls look good at first but fell out fast even with product. The ended up as soft waves on me.
  • Price, online cost of 3 payments of 39.99 plus 19.99 for shipping and handling equals $179.95. And I am not certain but I think you also have to pay $14.99 for their 30 day trial offer. So the total would be $194.94.
  • I don’t know what a normal return rate is but there were several people saying theirs broke. I watched at least one a week break. But they were on for 10 hour days.
  • If you don’t have all the pieces (ie heat guard, comb, etc) they won’t replace your piece if it breaks.
  • If you don’t straighten your hair and are wanting to curl. I would go with a curling iron or flat iron curls.
  • Recommendations:

    If it isn’t working for you there are 2 things commonly done wrong. User error not the product not working. You are either taking too much hair at a time. Or, you are going too fast. Yes, going slower will save you time, trust me. No touch ups will be needed.

    So, use the end of that awesome comb that I wish I had more of. Section off what is in between the prongs and just straighten that piece.

    Start off slow. If it is getting completely straight go a little faster. My hair isn’t very curly so I can go pretty fast through mine and still get a great finish.

    So in short, if you straighten your hair it is a good product. Better finish with less heat. But keep all the parts and receipt just in case (Detailed Warranty info). I don’t recommend it for making curls, just waves.

    Battle of the Nail Hardener

    Welcome to the battle of harder nails. On the left we have Sally Hansen’s Hard as Nails and to the right is Nail Life’s Nail Revitalizer. The rules are simple:

    1) My nails get a minimum of one coat a day for 30 days.
    2) Equal treatment; if it is time to remove and reapply on one hand I do it on both.
    3) No interference. So, no other polishes. So, no pretty colors for awhile :(.

    If you want to skip the day by day you can just jump to the summary and winner here.

    Day 1: My nails are in worse shape than usual. I got shellac done at the salon. The gal apparently filed my nails paper thin. Nail Revitalizer has been my go to nail hardener. But at about $8 a bottle I wondered if there could be something that works well but is cheaper. Hard as Nails got picked because it was only $3 and easy to find almost everywhere. Because my nails are so thin I painted 4 coats on the first day. I wanted to make them a little thicker so they wouldn’t break.

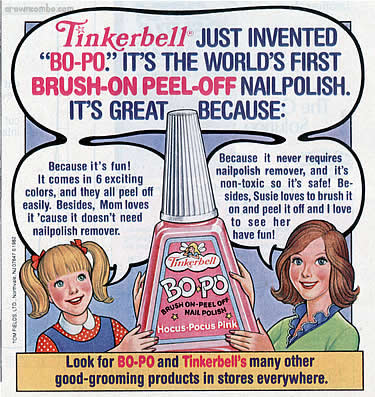
    Day 4: I have been coating my nails everyday with an additional coat. The polish is already flaking. Or, is the right word peeling? Anybody remember Tinkerbell nail polish that peeled up to remove? Yeah, it is like that. I think I need to remove and reapply. The Nail Revitalizer usually lasts a week or more before needing to be redone. Either my nails were in that bad of shape (my money is on that) or it was because of the extra layers on day 1. My nails themselves are flaking pretty badly.
    Day 7: I was really hoping the flaking would have gotten better by now. I know you are supposed to judge your nails by the new growth. But I was hoping something would have helped by now.

    Day 10: Remove and reapply. Peeling polish on both hands again.

    Day 15: I am still having to file my nails really short in order to minimize flaking. Remove and reapply.

    Day 19: So I have to admit itthe polish on my nails starts to be a bit annoying when it peels. This last time it started to and I used my teeth to peel it all away. Reapply.

    Day 23: Really no change? Also, the Nail Revitalizer is starting to thicken in the bottle and the cap is getting harder to remove

    Day 28: Finally my nails are a little thicker. I chock it up to natural growth. I can’t say either nail polish has done any good.

    Day 30: Since, I know Nail Revitalizer does do work for my nails I think I better extend this trial. Because it is apparently not long enough to make a difference… Yet.

    Day 33: I am bored of the natural nail look. I am ready for a little color in my life.

    Day 37: My right hand (Nail Revitalizer) officially, and finally, is flake free. Lefty with the Hard as Nails is definitely doing better than it was. But the edges of 4 nails still have damage from flaking.

    Day 39: Sometimes I am a little dingy. I thought Sally Hansen was a lot cheaper. But it comes in a much smaller bottle. The math… Sally Hansen’s Hard as Nails (at Walgreens) $2.99 for .45oz. So the price is $6.64 per ounce. While Nail Life’s Nail Revitalizer (at Sally Beauty Supply) $7.99 for 1.19oz. So the price is $6.71 per ounce. So the difference is Nail Revitalizer cost 7 cents more per ounce and so far it is the only one that has worked.

    Day 40: Hard as Nails polish peeling and taking the nail with it. Come on Sally, hard as nails my foot… Well, my finger.

    Day 45: We have a winner! Read on for the summary and who won. Sally Hansen’s Hard as Nails (at Walgreens): All 5 nails have pieces of nail missing. My nails are thinner than the other hand. At $6.64 per ounce it is 7 cents per ounce cheaper than Nail Revitalizer. But I would not buy Hard as Nails again. It is no better than a 97 cent clear top coat.

    Nail Life’s Nail Revitalizer (at Sally Beauty Supply): I do have one chipped nail on that hand. I am however right handed so that hand should be more likely to break but it has less damage. My nails are definitely thicker on that side. They even seem to grow faster. But that may just be because they aren’t flaking as badly. Either way, it has been my go to in the past and it looks like it is staying that way. It is $6.71 per ounce and worth it.

    So the winner is Nail Life’s Revitalizer. And finally I get to paint my nails a color!!!

    Sugaring “Wax” Recipe and Video

    Recipe:
    2 cups white sugar
    1/4 lemon juice
    1/4 water

    My experience and tips:
    When working without a thermometer (because that is all I have ever done) that amber color is key. The video shows it really at 2:50. I also like to run cold water over a drop on the spoon. If it doesn’t separate it is done. But cook it any longer and you will have to use her tip at the end about adding water to the warmed hard candy sugaring. I have heard other types of sugar work. I just made a batch with brown sugar and it definitely does not work as well as my last batch made with white sugar.